Software Information
- Category: Online Bakery POS Software
- Demo URL: www.crunktechsoft.com/mstasti
- Catalog Download:
Online Bakery POS Software uses
Our POS system speeds up your checkout process significantly. By having a centralized database of your products, pricing, and customers, you can quickly find the products, assign the order to a customer, and apply discounts with little effort. Our software includes Item Category, Menu Items, Add Stock, Stock List, Billing , Customer, Reports and Property Configurations
Online Bakery POS Software features
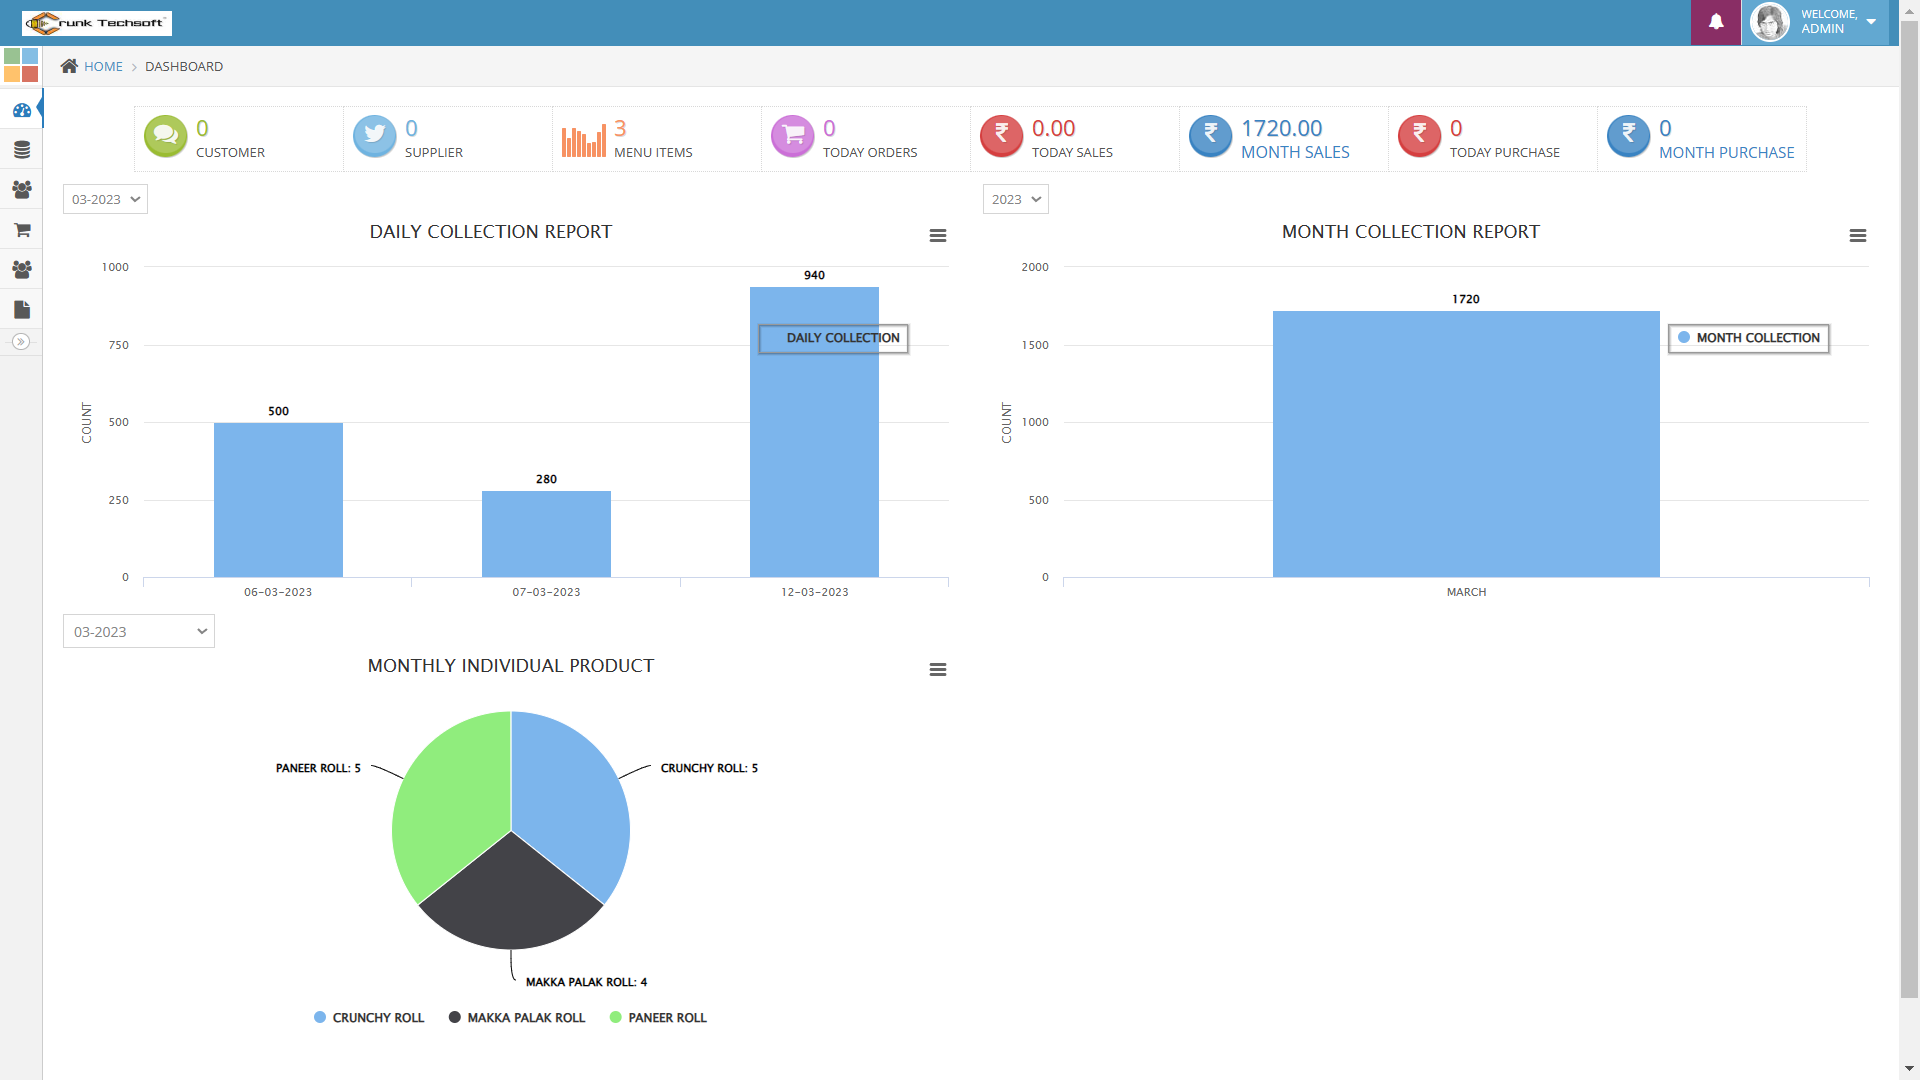
Dashboard
All in one desk.
- Attractive dashboard
- View Shortcut links of most usable links
- New Category
- New Item
- New Supplier
- New Customer
- New Sales
- View Total number of Suppliers
- View Total number of Customers
- View Total number of Purchases
- View Total number of Sales
- View of today Sales
- View of current Month Sales
- Bar Chart of Sales and Purchase both monthly and yearly
- Pie Chart of Sales Items
Item Category
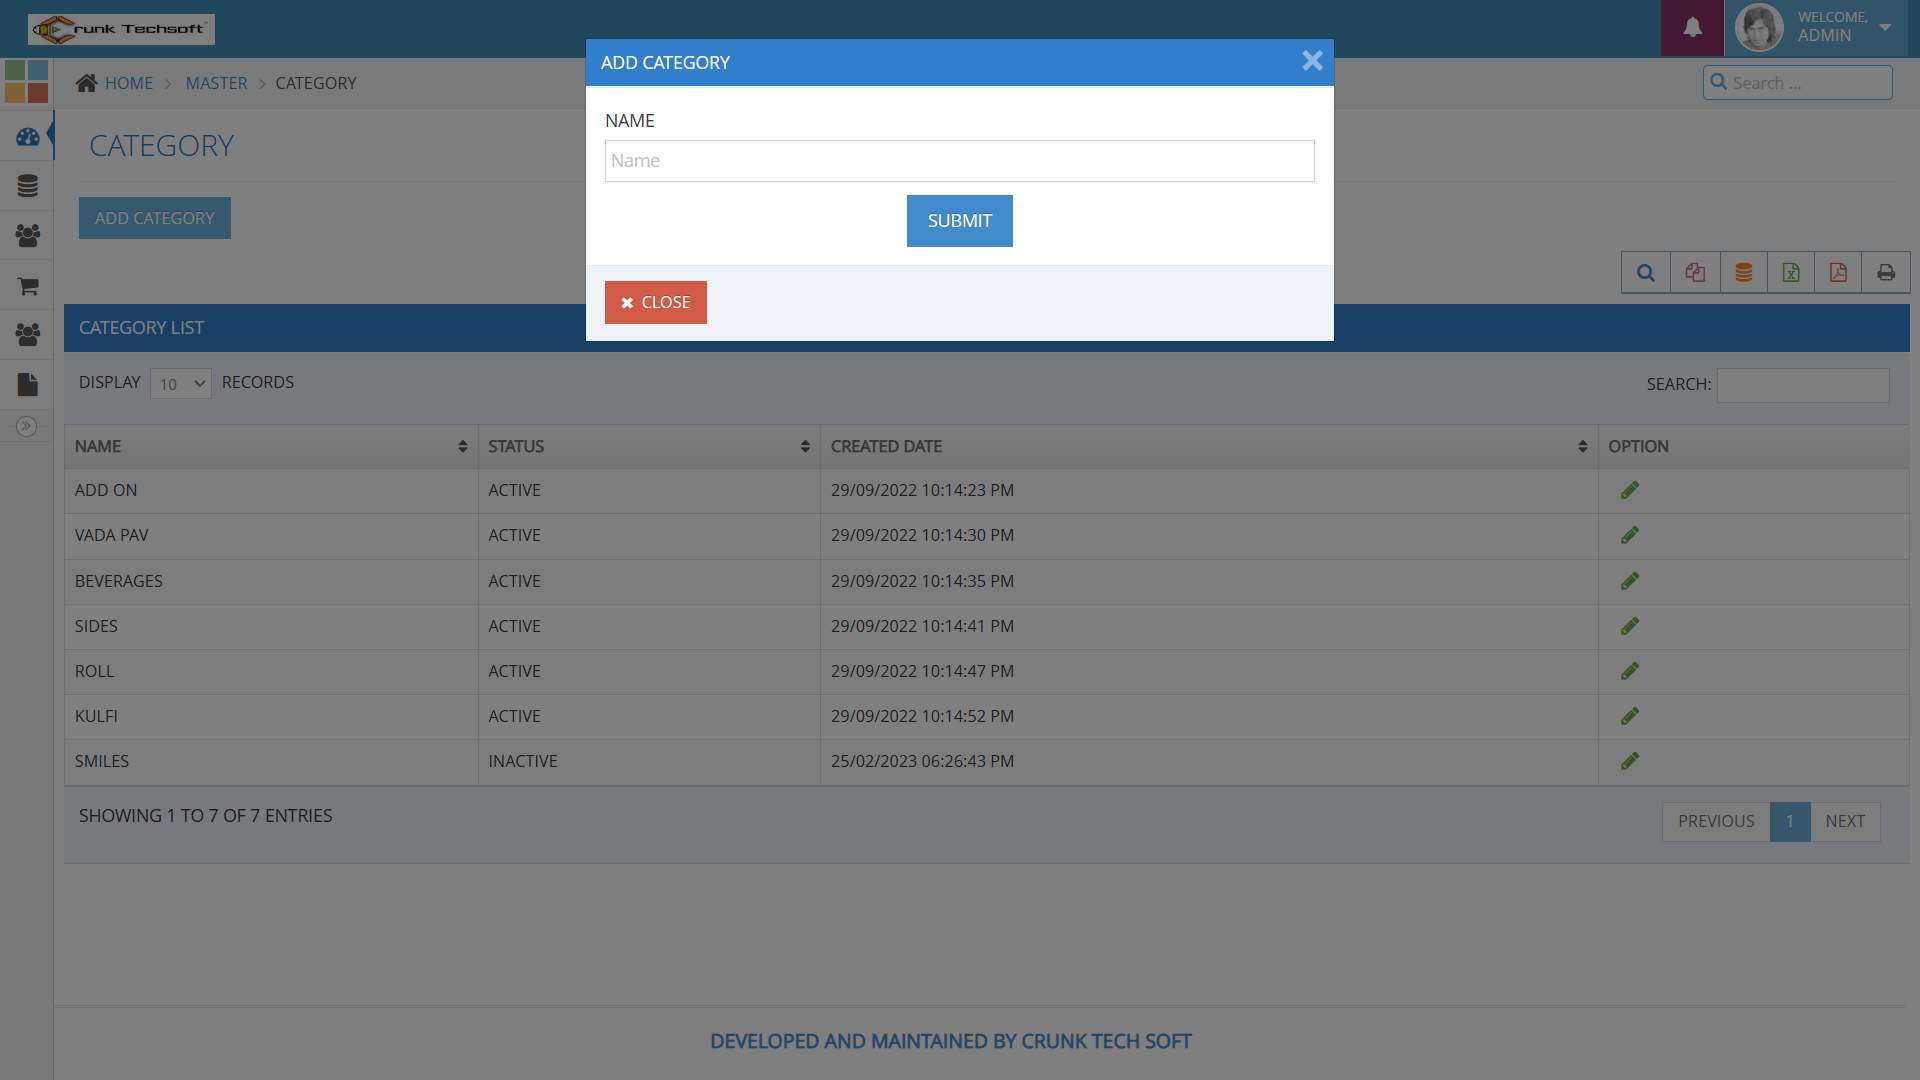
New Category:
Category -> New Category
Adding a Categorys it's a very easy task. Enter Category name, description(Optional field) and click on Save button.
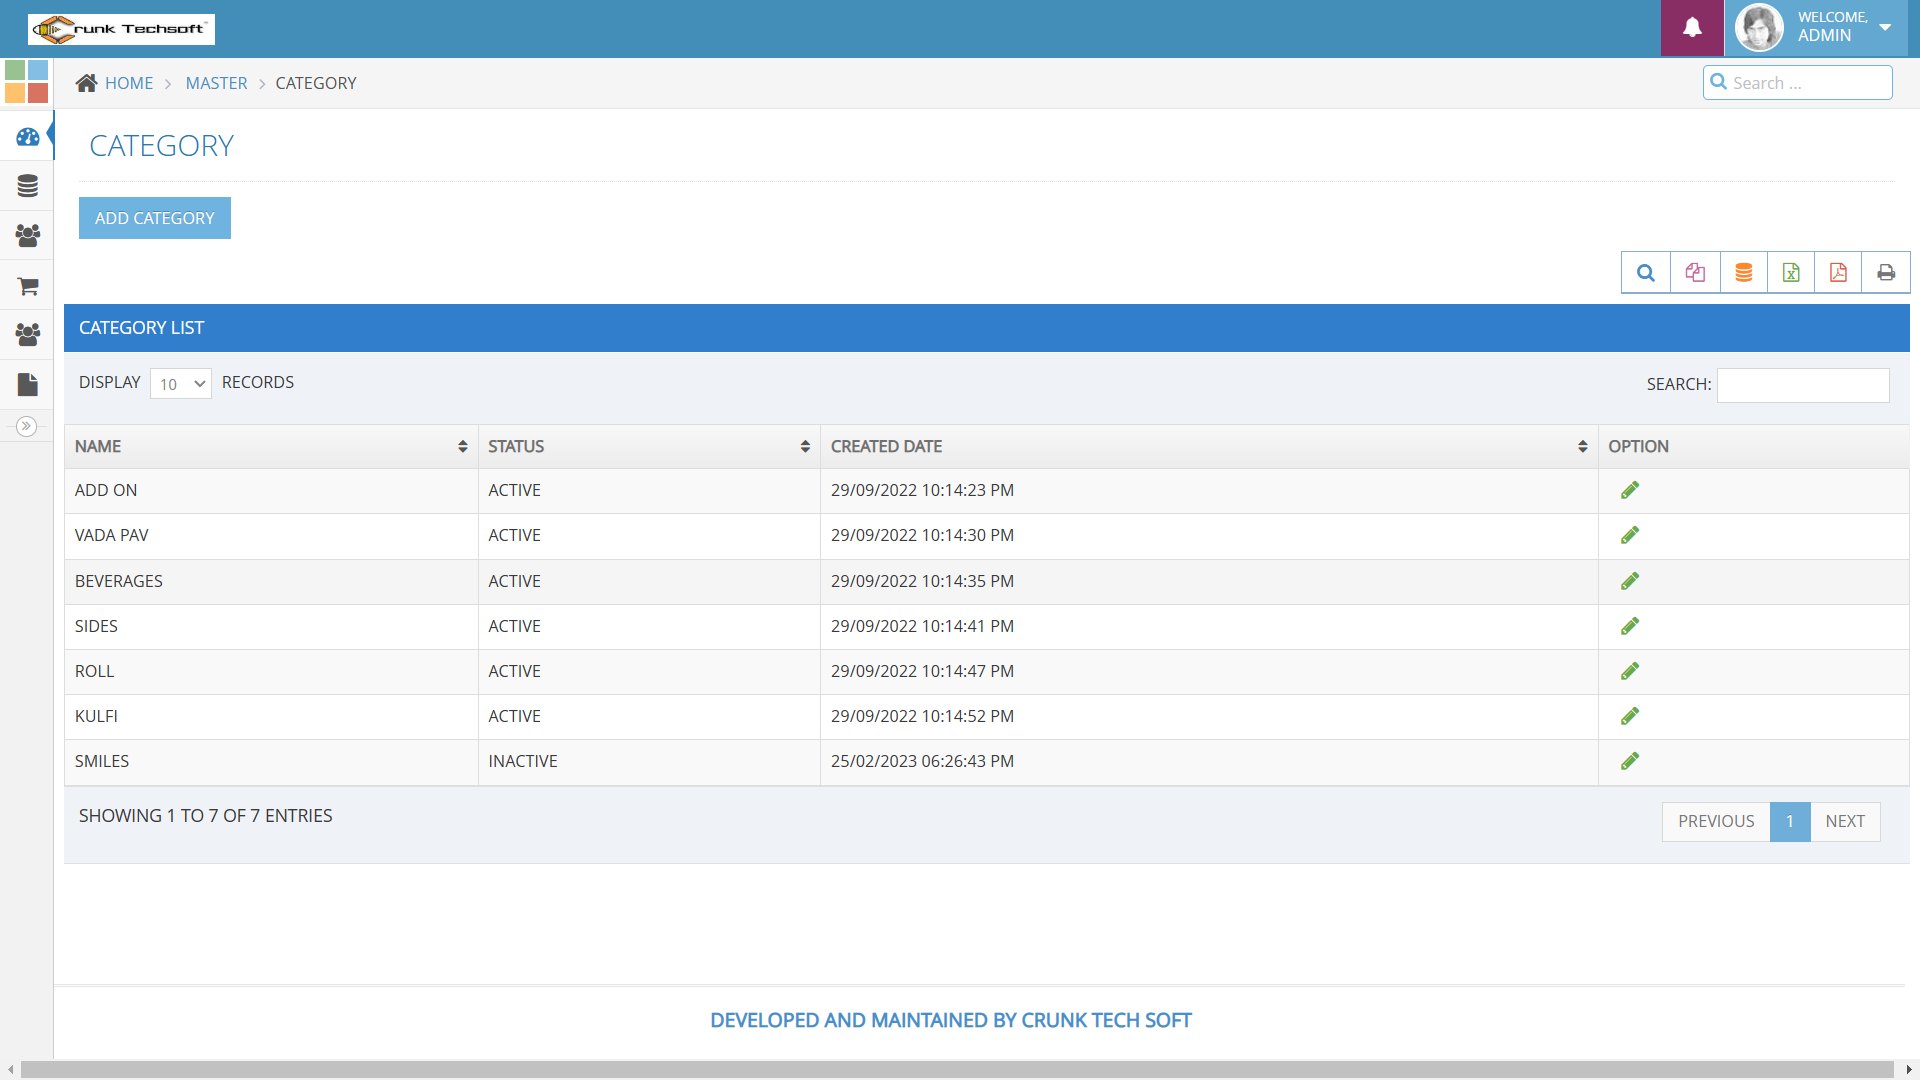
Categorys List:
Categorys -> Categorys List
You can view the all the added categorys list and you can manage categorys list by Delete & Edit actions.
New Category :
Categories List :
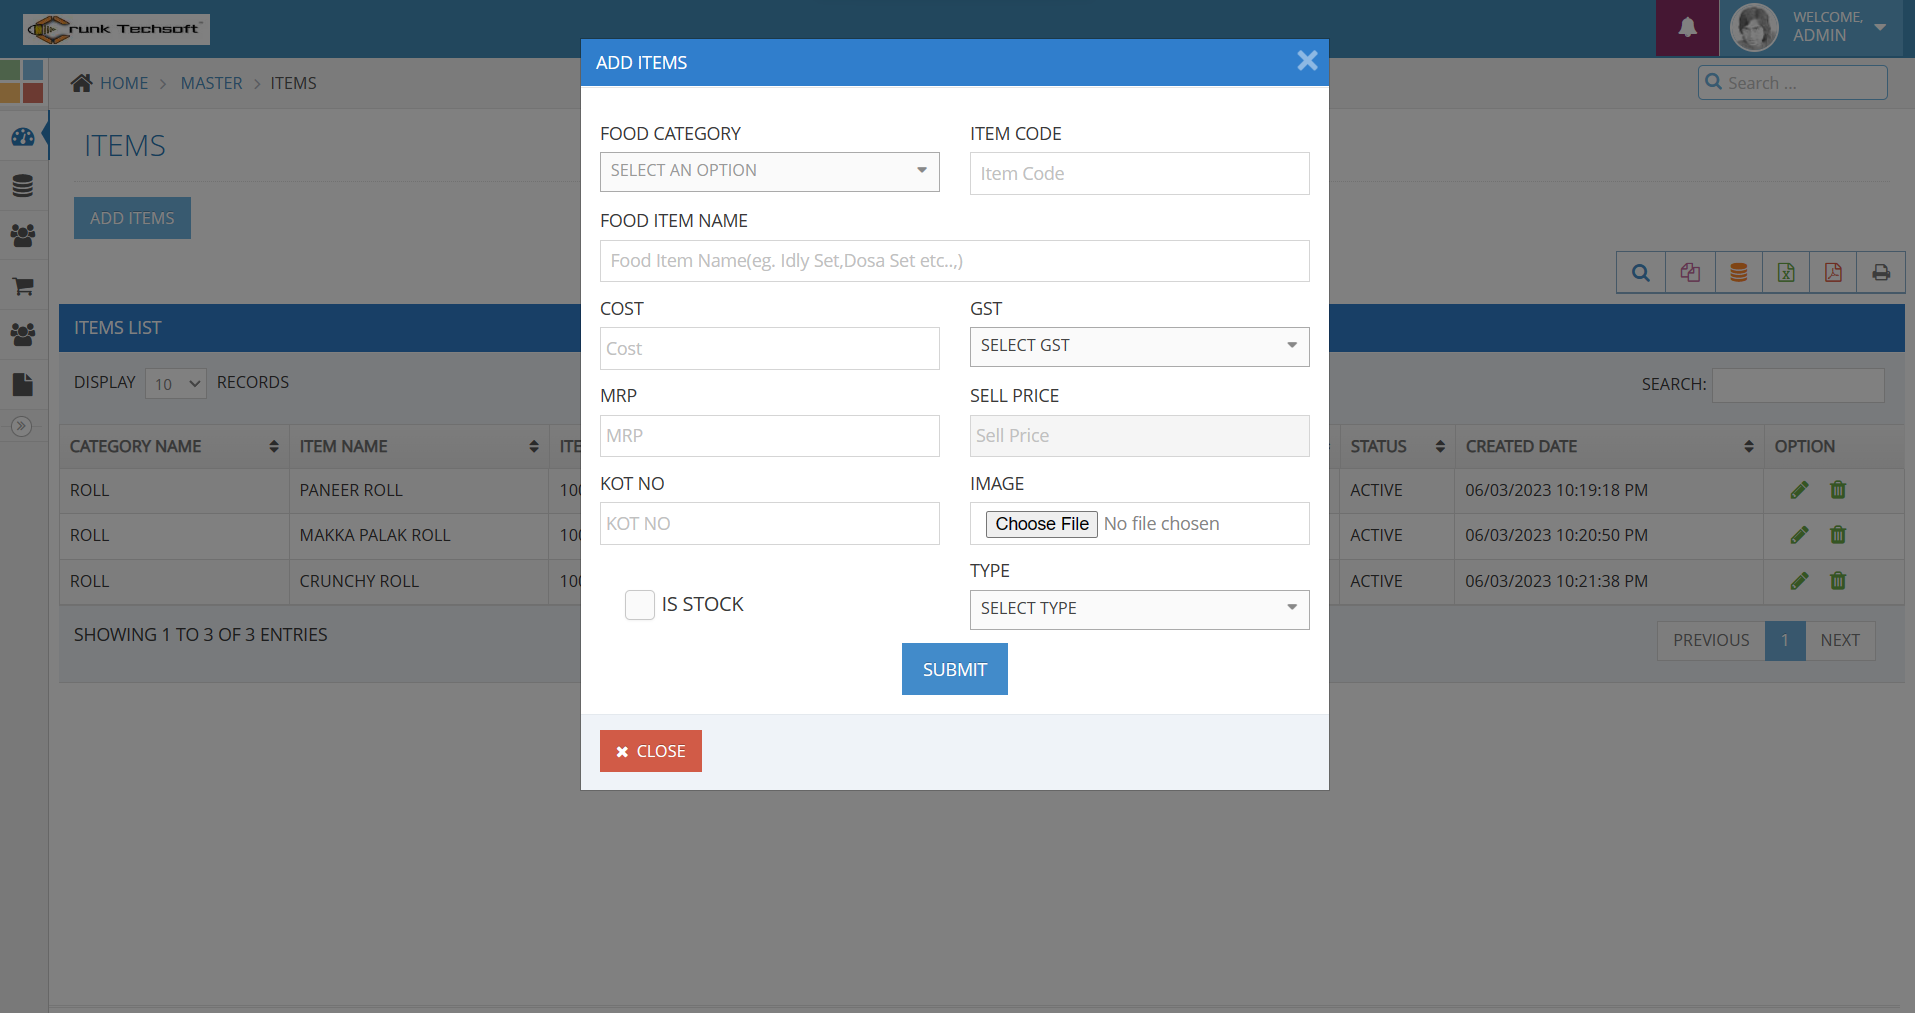
Menu Items
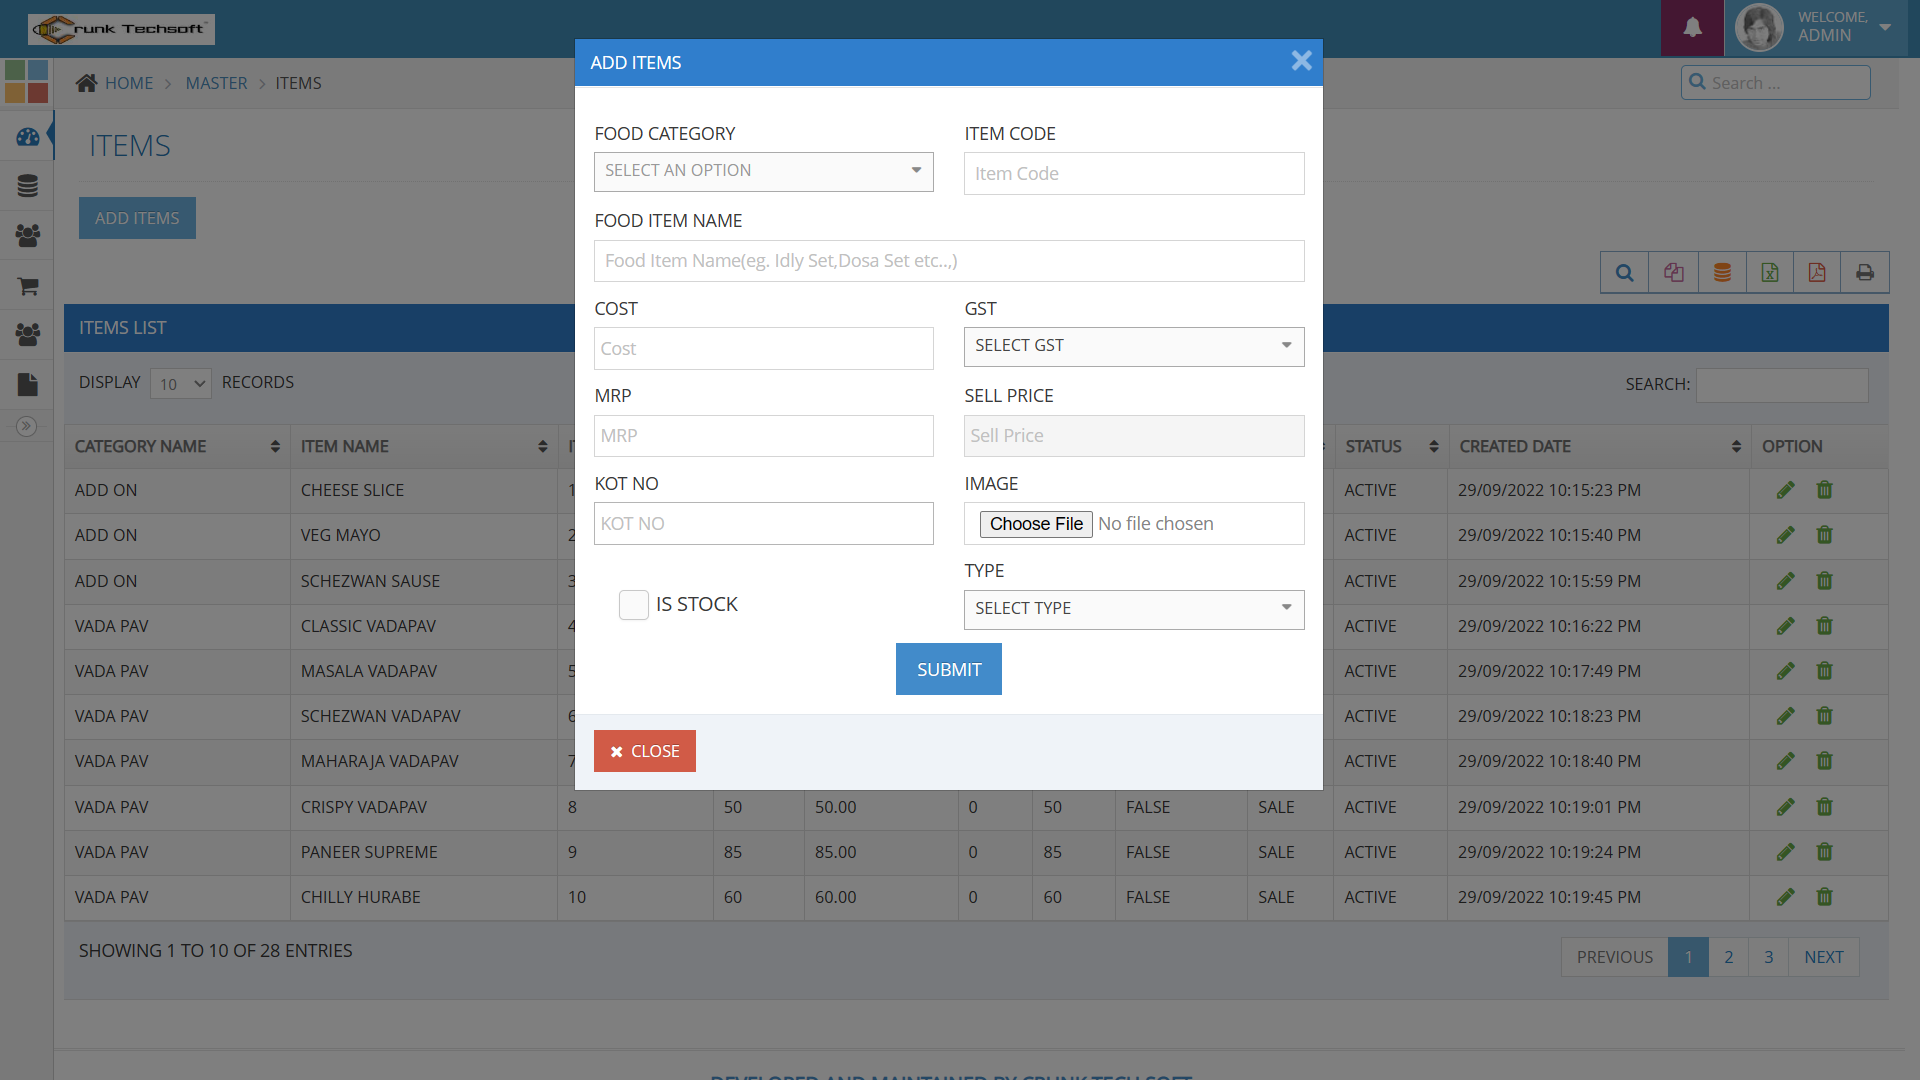
New Menu Item:
Items -> New Item
Adding a Items it's a very easy task. Enter Item name, Select Category, Unit, Code, MRP, Select Image(Optional field),Selling Price, Select GST, Is stock and click on Save button.
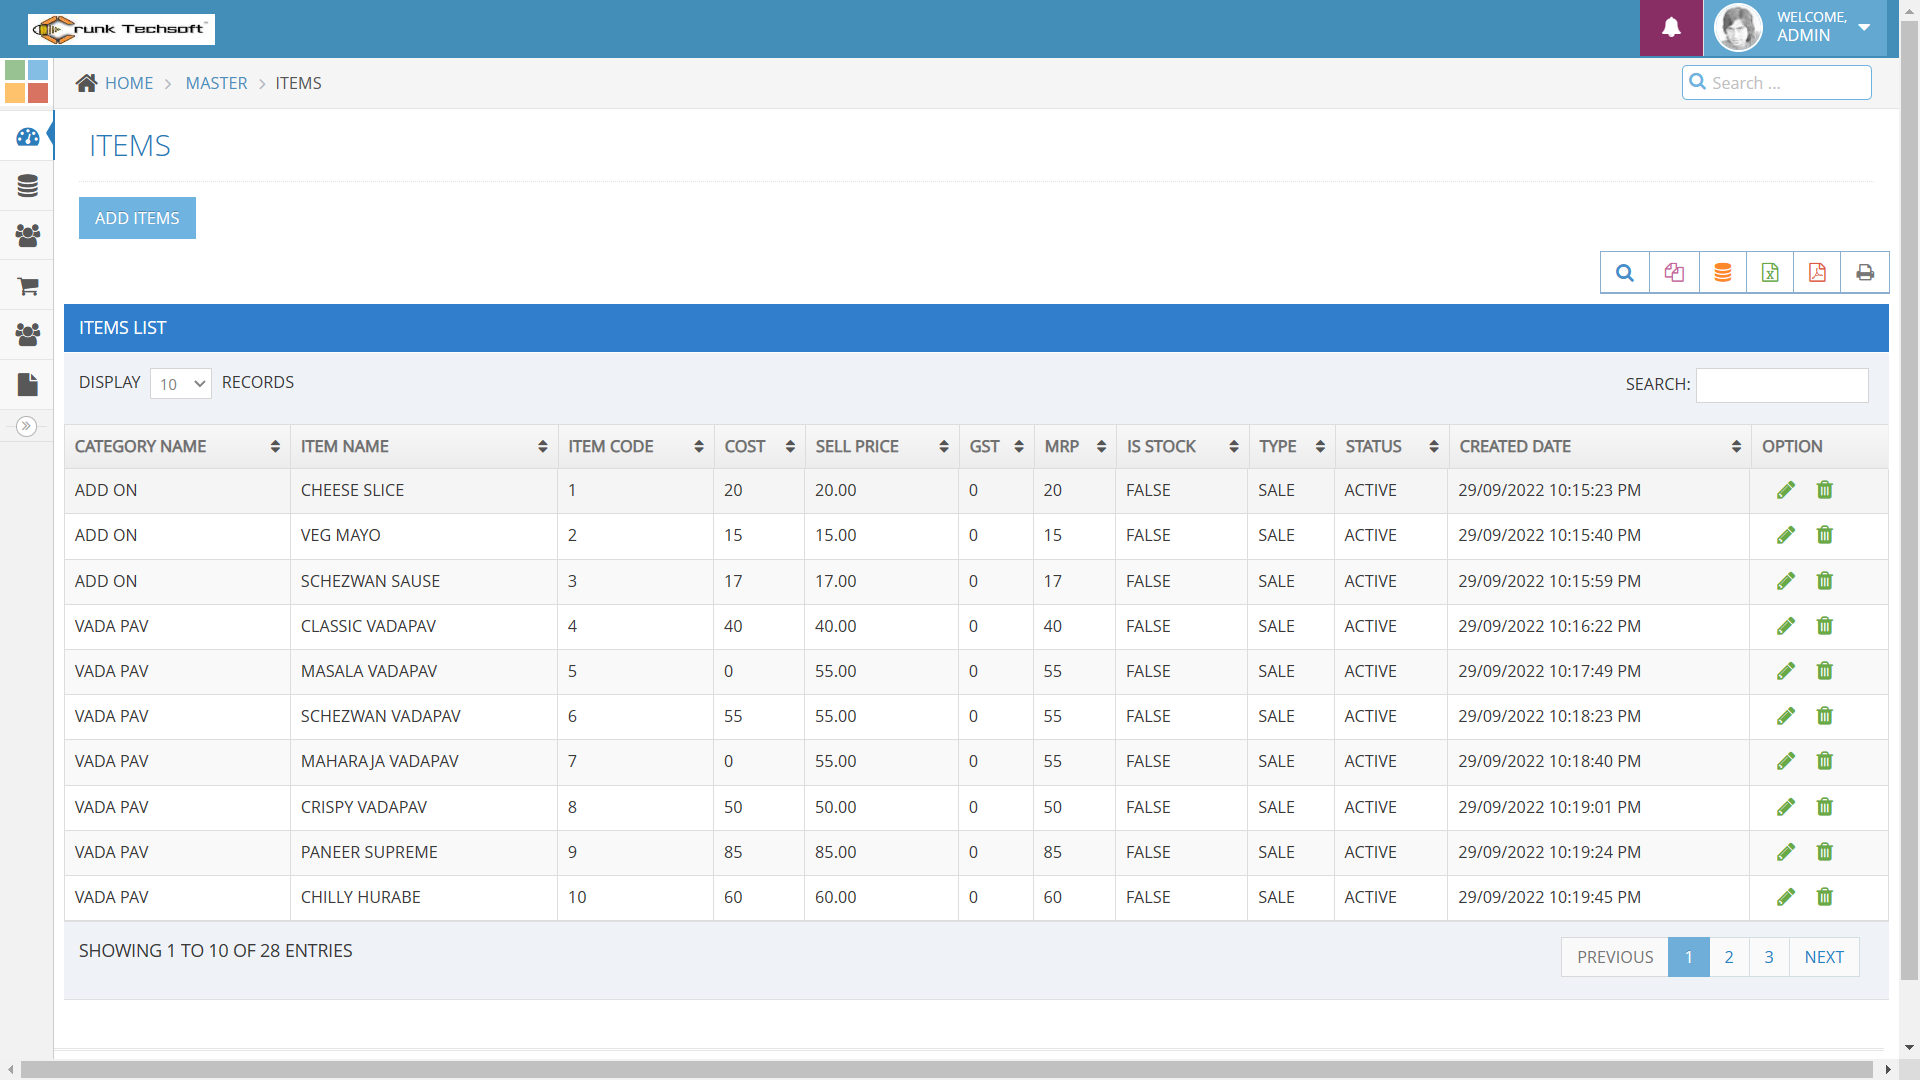
Items Menu List:
Items -> Items List
You can view the all the added Items list and you can manage Items list by Delete & Edit actions.
New Menu Item :
Menu Items List :
Sales
New Sales:
Sales -> POS
-
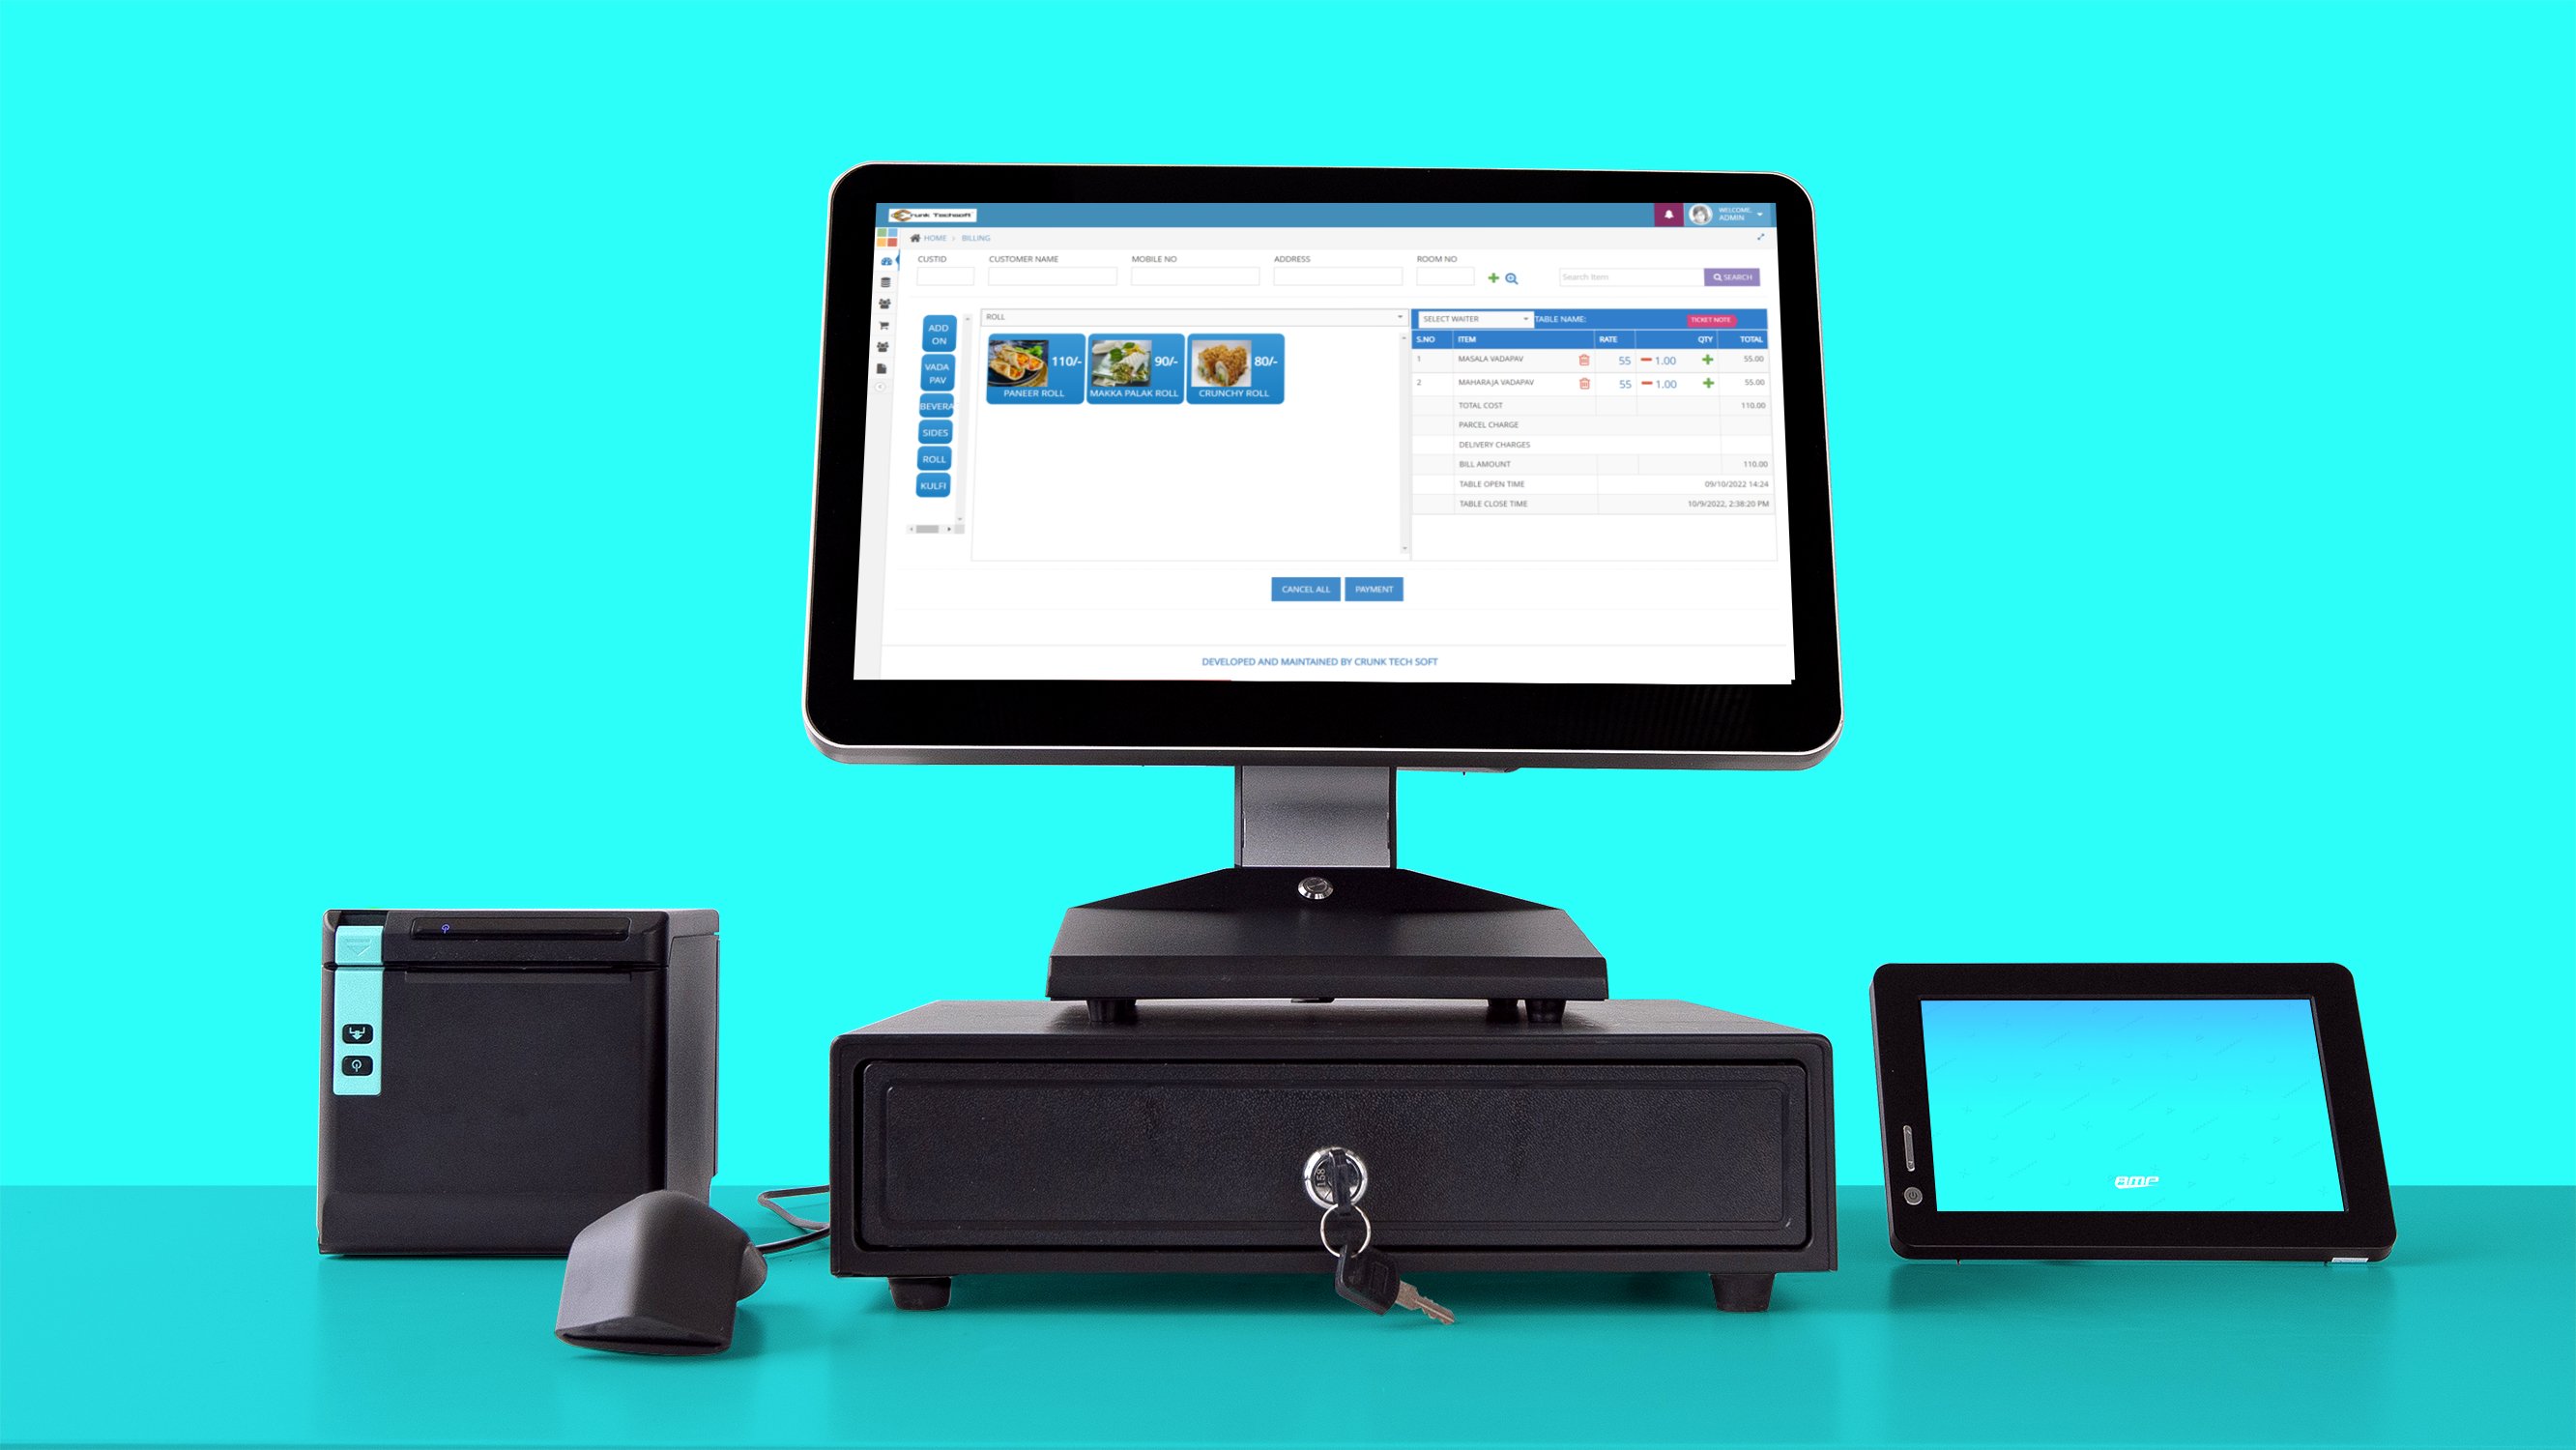
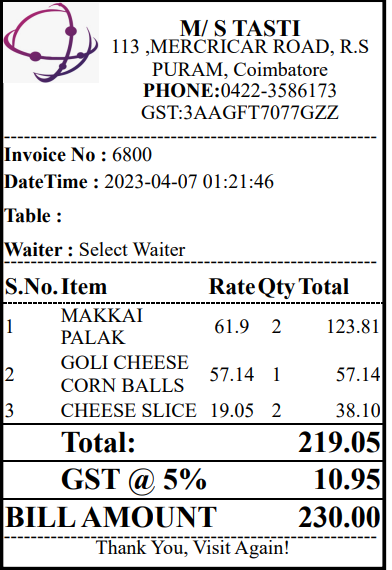
POS Sales :
Easy version sales entry. Here you can sell to Specific or Walk-in Customer.
Select Items from Item Search box using Item name, Barcode or Item code.
Select Items From Right Side Box, Also given category wise search and Specific Item Wise search Box.
From Items List You can Increase or Decrese Item Quantities. On Total amount You Provide Discount on Overall sales.
Payments Can Be access with Cash Or Multiple Payments Oprions! - POS Invoice : POS Formatted invoice.
New Sales:
Sales -> New Sales
- Creating or entering a Sales information in inventory is a very easy task. Select Customer,You need select the items from the table, where item name has the standard search box for items name, here you need to select item name, all other information will be shown in the same row, it includes HSN, available quantity, sales quantity,UQC,GST% and you select any number of items in purchase table and click on Save button.
- Sales Invoice : Create the Sales Invoice you can take the print.
- POS Invoice : You can print sales invoice in POS machine.
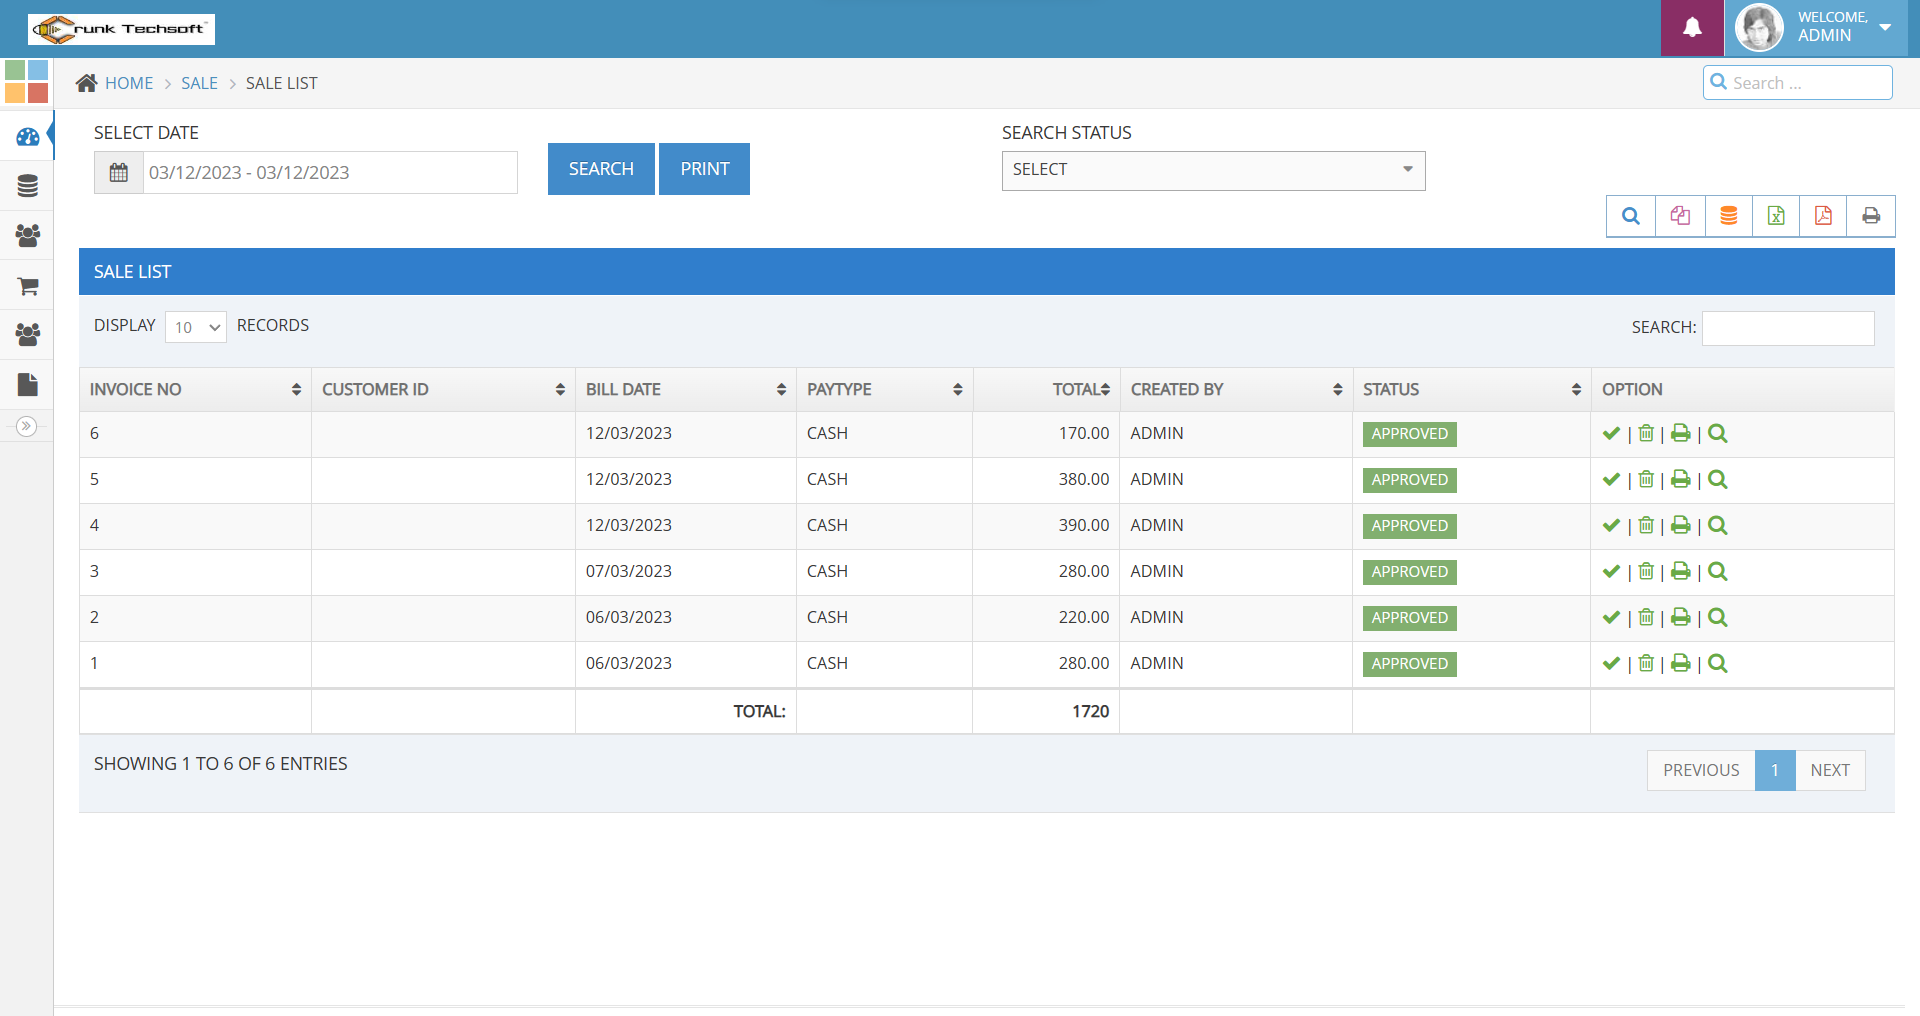
Sales List:
Sales -> Sales List
You can view the all the added Sales list and you can Sales list by Delete & Edit actions.
Pay Sales Payments:
Sales -> Sales List -> Click on Action Button -> Click on Payment Button
View Sales Payments:
Sales -> Sales List -> Click on Action Button -> Click on View Payments
POS :
Sales List :
POS Invoice for Sales :
Customers
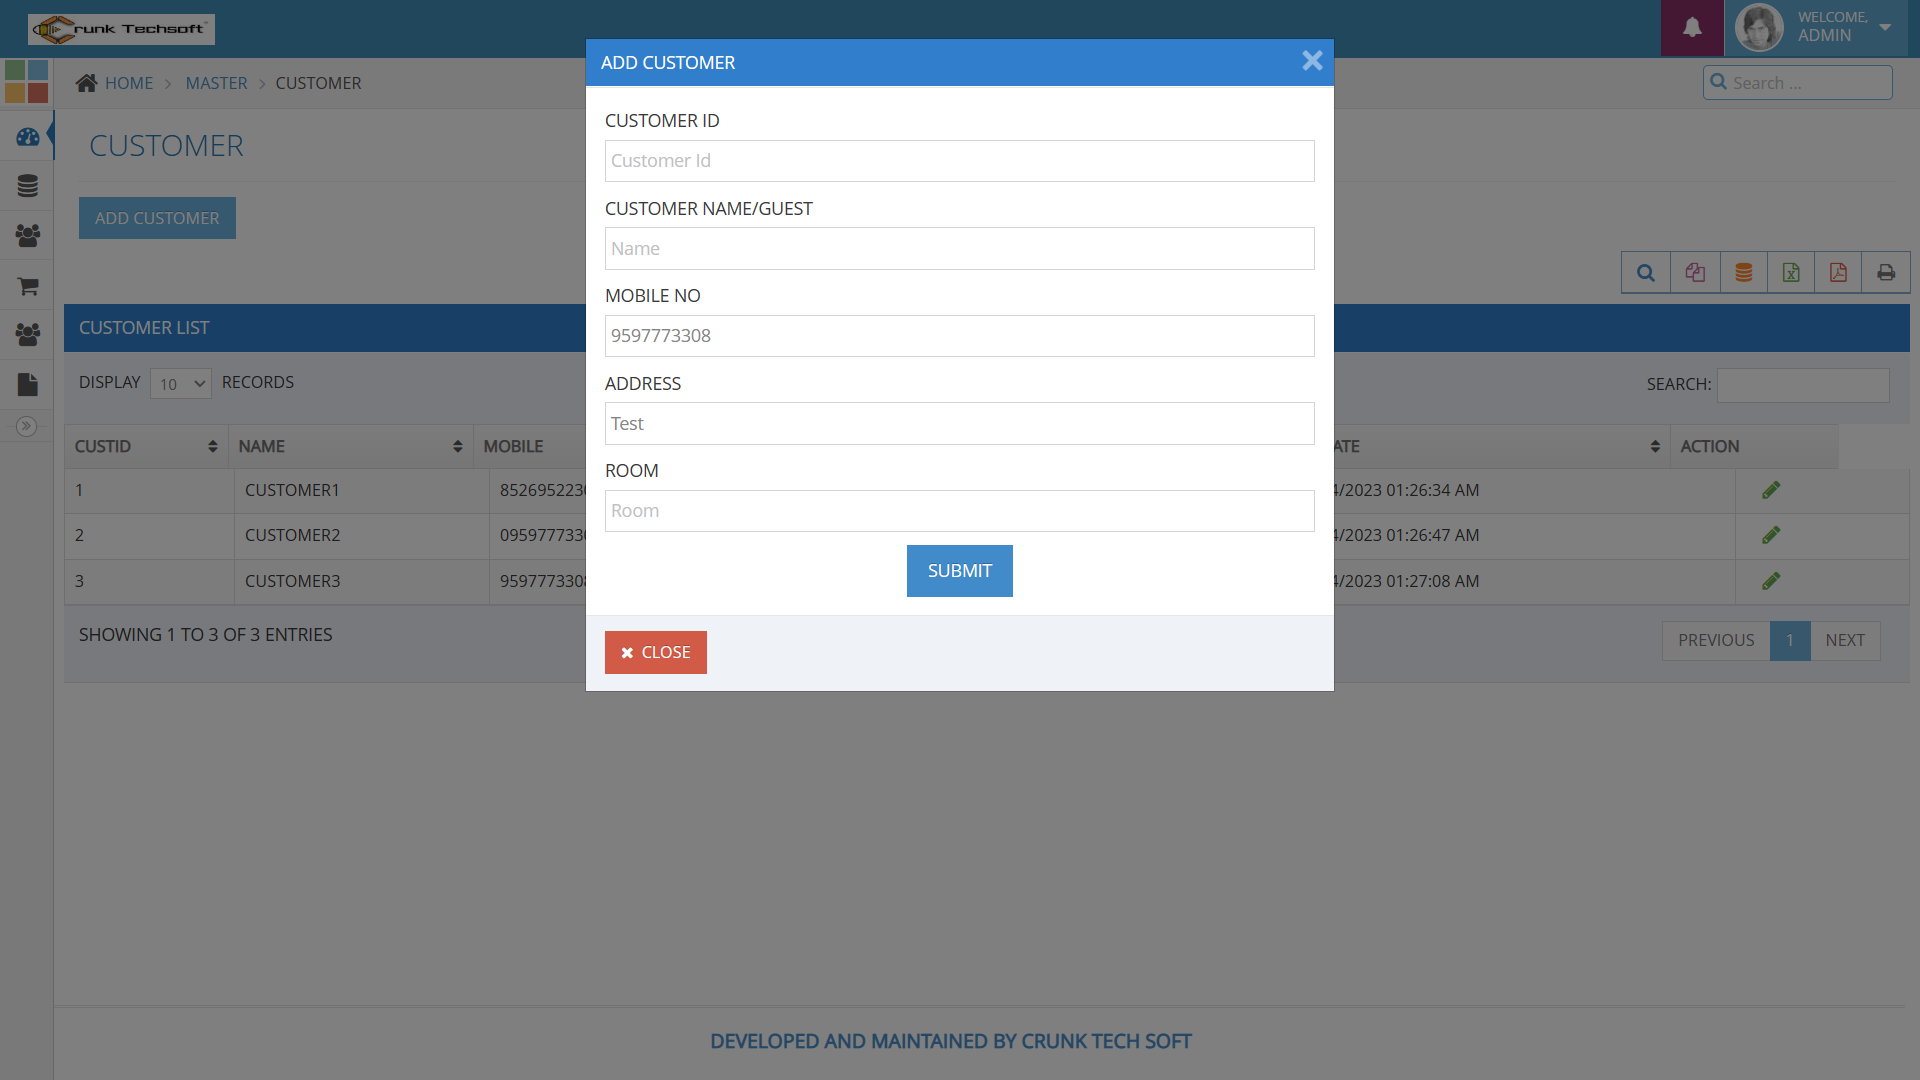
New Customer:
Customers -> New Customer
Adding a Customers it's a very easy task. Enter Customer name, Mobile, Phone, Email, GST Number, TAX Number,
Opening Balance, Country(Optional field), State, City, Postcode(Optional field), Address(Optional field) and click on Save button.
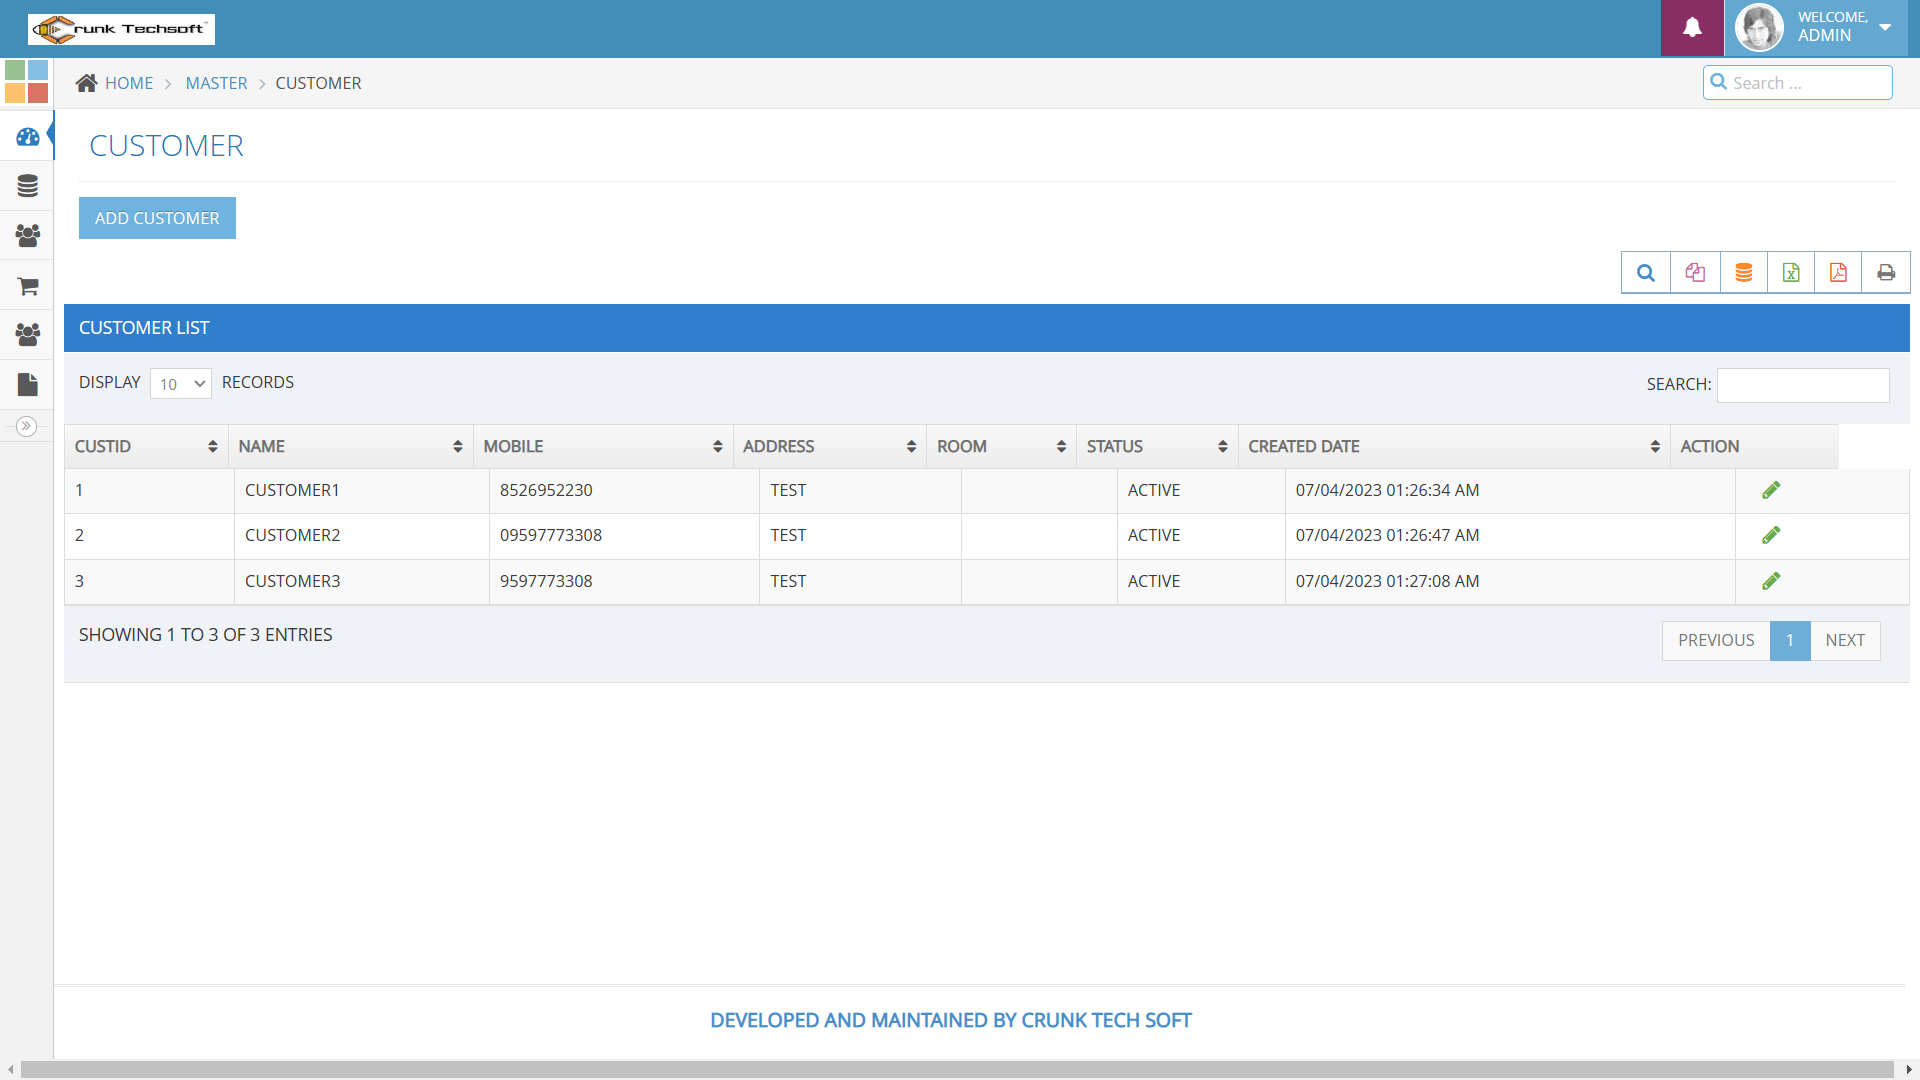
Customers List:
Customers -> Customers List
You can view the all the added Customers list and you can manage Customers list by Delete & Edit actions.
New Customer :
Customers List :
Reports
Sales Report:
Reports -> Sales Report
- Select from date, to date and customer name-> click on show button.
- In the same form it will shows all the required information
- You can export the report data into excel format.
Sales Return Report:
Reports -> Sales Return Report
- Select from date, to date and customer name-> click on show button.
- In the same form it will shows all the required information
- You can export the report data into excel format.
Purchase Report:
Reports -> Purchase Report
- Select from date, to date and Supplier name-> click on show button.
- In the same form it will shows all the required information
- You can export the report data into excel format.
Purchase Return Report:
Reports -> Purchase Return Report
- Select from date, to date and Supplier name-> click on show button.
- In the same form it will shows all the required information
- You can export the report data into excel format.
Expense Report:
Reports -> Expense Report
- Select from date, to date and Category name-> click on show button.
- In the same form it will shows all the required information
- You can export the report data into excel format.
Profit & Loss Report:
Reports -> Profit & Loss Report
Stock Report:
Reports -> Stock Report Item Wise
Reports -> Stock Report Brand Wise
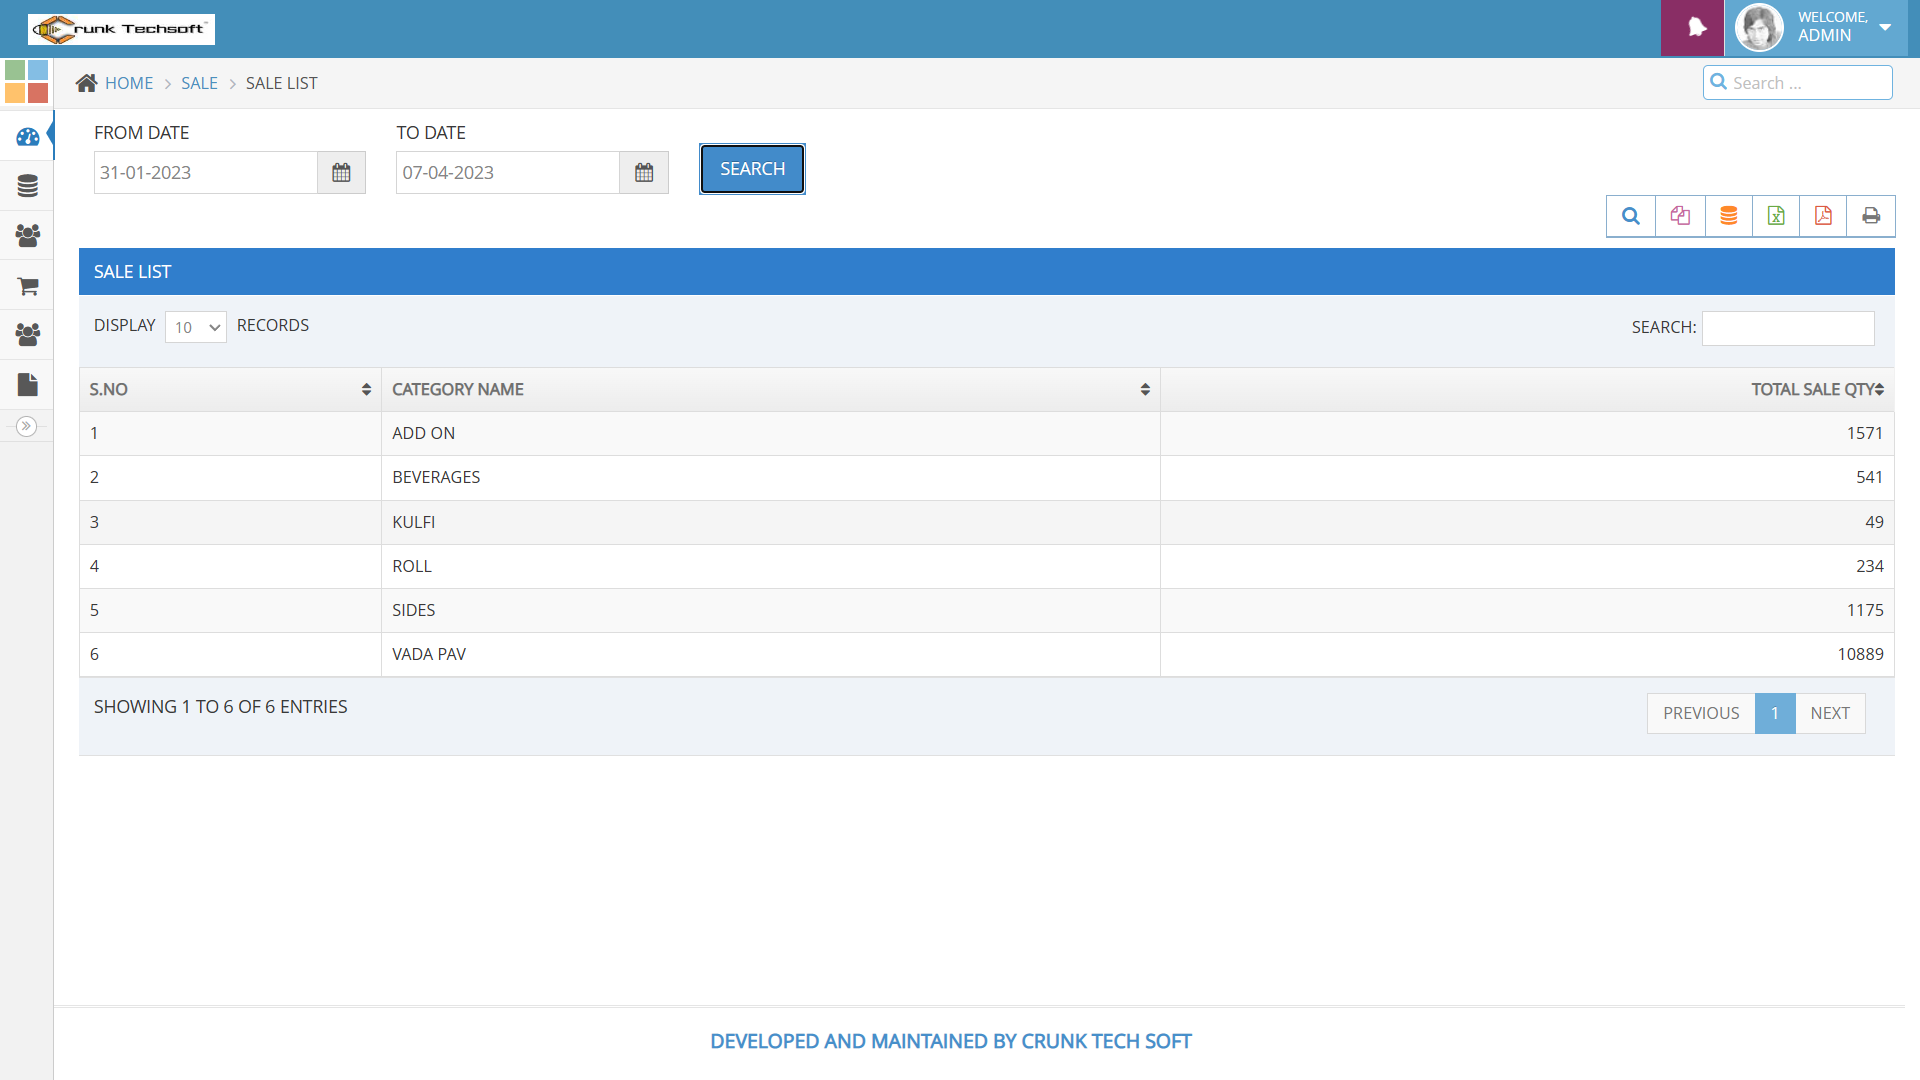
Item Category Sales Report:
Reports -> Item Sales Report
- Select from date, to date and Item name-> click on show button.
- In the same form it will shows all the required information
- You can export the report data into excel format.
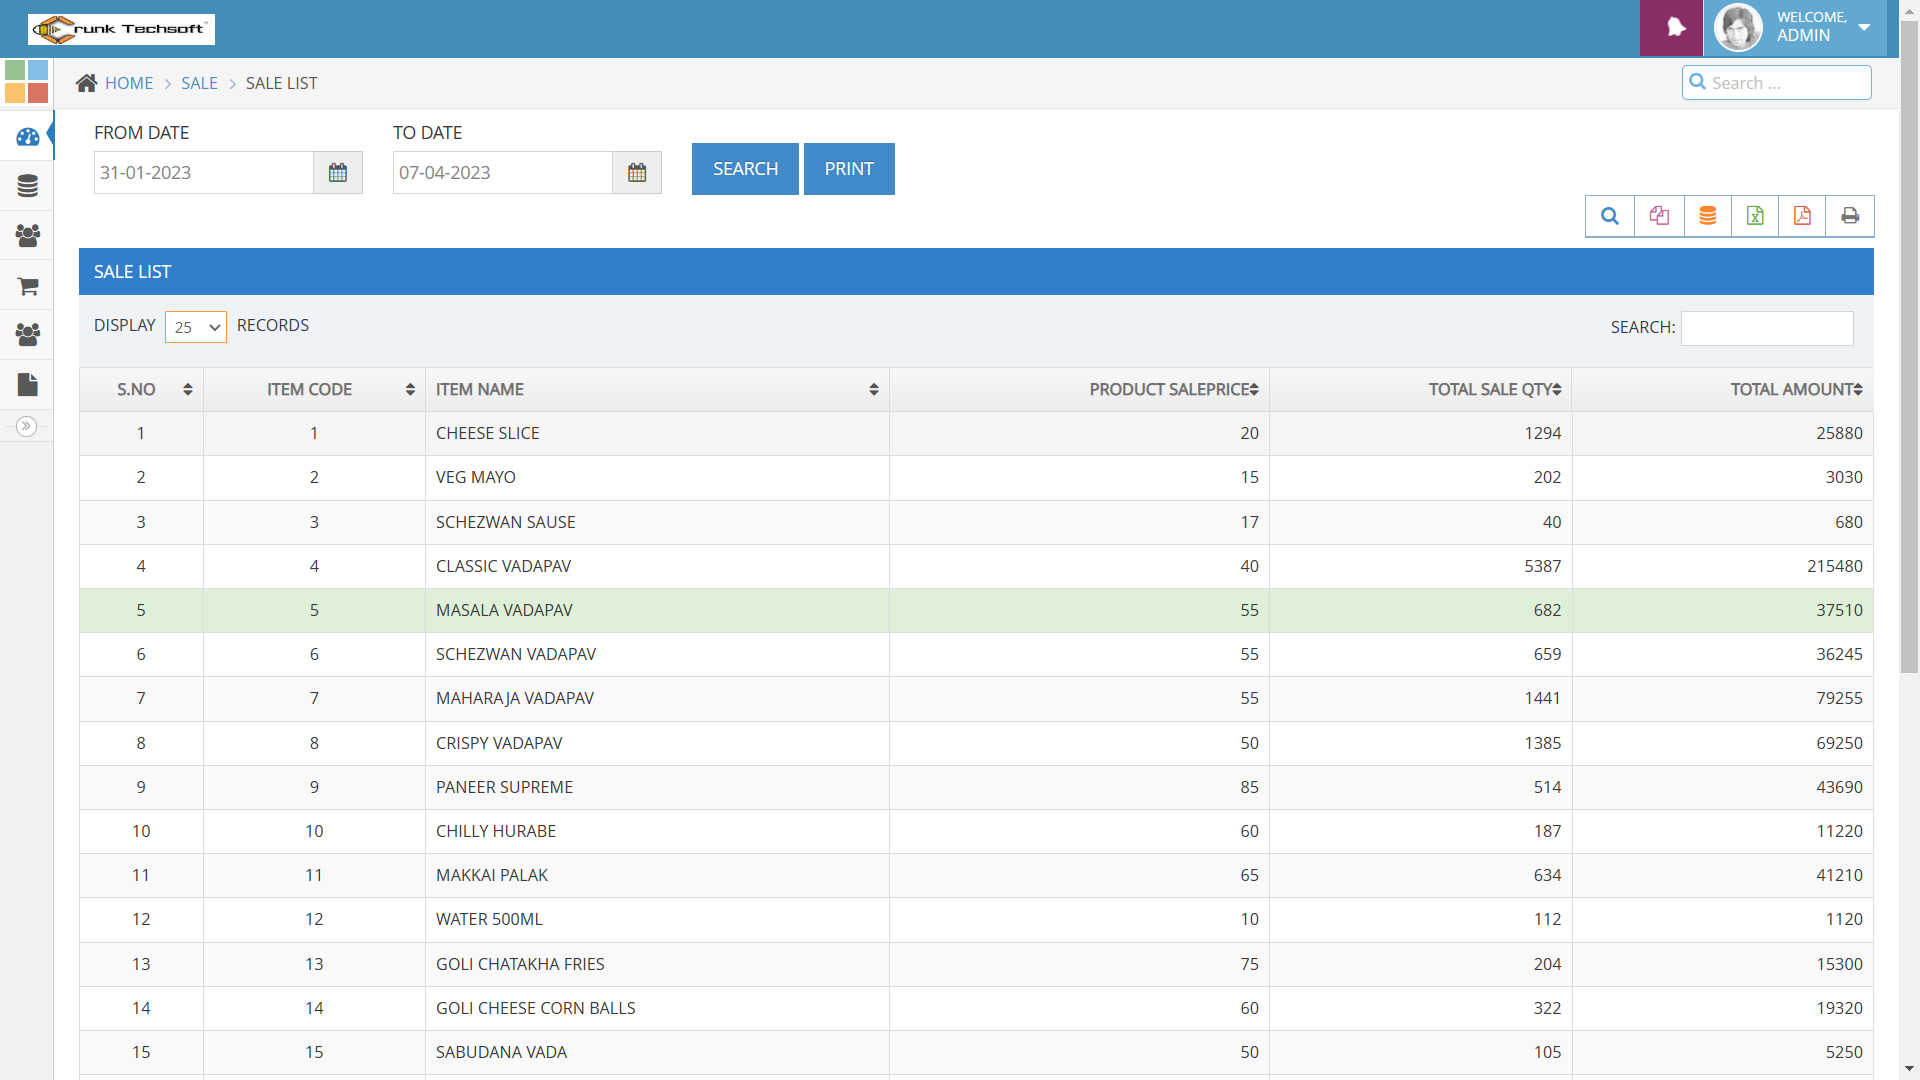
Item Sales Report:
Reports -> Item Sales Report
- Select from date, to date and Item name-> click on show button.
- In the same form it will shows all the required information
- You can export the report data into excel format.
Purchase Payments Report:
Reports -> Purchase Payments Report
- Select from date, to date and Supplier name-> click on show button.
- In the same form it will shows all the required information
- You can export the report data into excel format.
Sales Payments Report:
Reports -> Sales Payments Report
- Select from date, to date and Customer name-> click on show button.
- In the same form it will shows all the required information
- You can export the report data into excel format.
Expired Items Report:
Reports -> Expired Items Report
- Select from date and Item name-> click on show button.
- In the same form it will shows all the required information
- You can export the report data into excel format.
Report: Sales Report :
Report: Menu Item Sales Report :
Report: Category Sales Report :
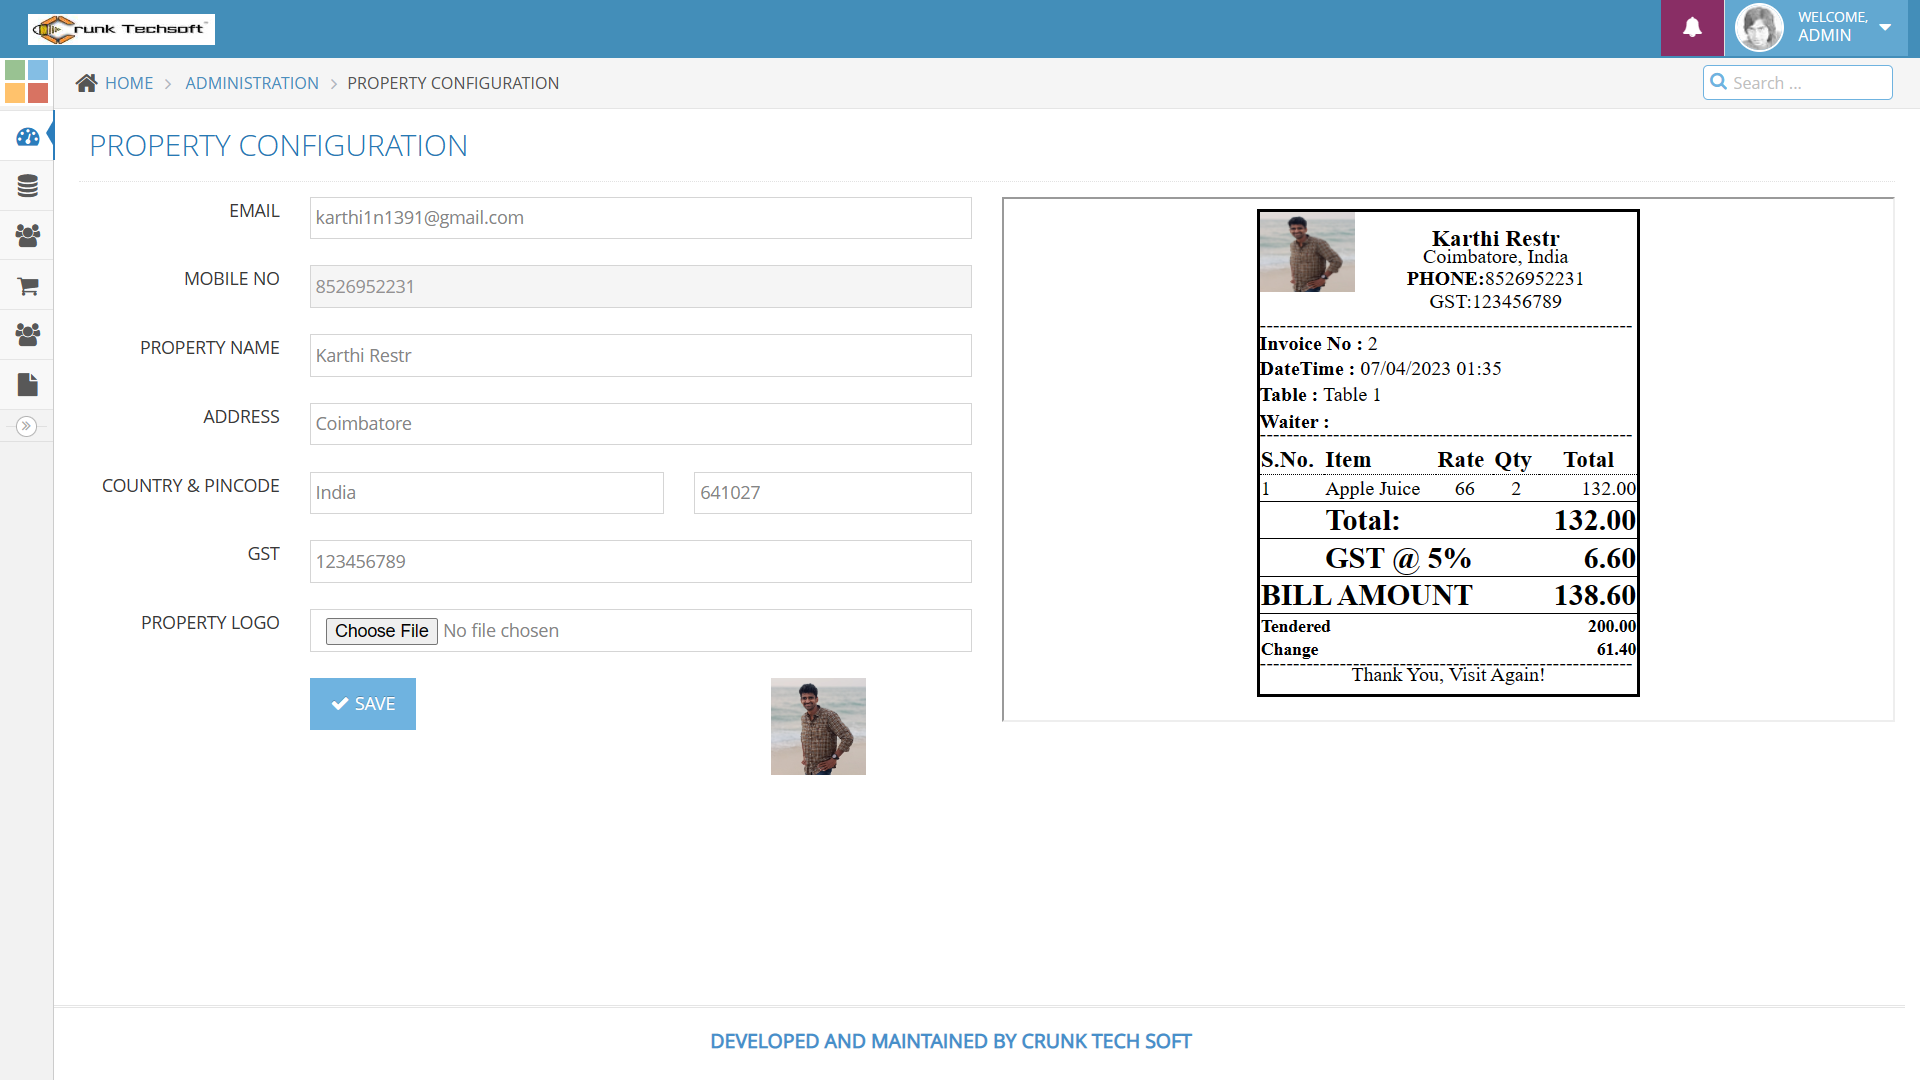
Property Configuration
- We can change the configuration setting of POS invoice
- Property Name
- Address
- Country & pincode
- GST
- Option to Logo upload